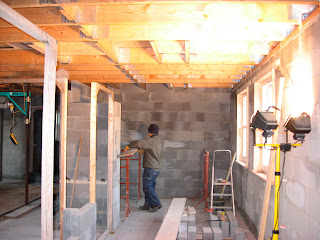
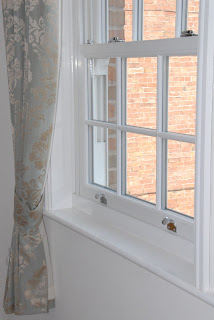
After the milestone of installing the windows it was back to the less rewarding chore of more block laying. I know most modern houses have stud walls and the later ones are only very narrow so they appear very flimsy, but we were determined to make ours look substantial so at the early stages we choose to use block work for all internal walls. It makes for a quality feel to a building but it needs the upper floors to be rigid and that's one of the reasons why we opted for block and beam upstairs. Laying the first few blocks on the upper floor started to show how the rooms fitted into the shell of the building and for the first time the internal layout started to appear.
 |
| Rooms start to appear |
Once we had finalised the boundaries for all the rooms the stairs could be fitted. We had previously ordered the stairs which consisted of one straight flight and a double flight with quarter landing from a local manufacturer called, wait for it! 'The Timber Stair Manufacturers Ltd' original isn't it. However they were very good, their designer came to site to measure up and as I had never fitted a set of stairs before he was very helpful and gave me lots of guidance.
The kit of parts arrived soon after placing the order and were extremely good quality with Hemlock strings and spindles, Oak base rails and handrails and MDF treads. The solid oak option was prohibitive!!
 |
| Kit of parts arrive for the stairs |
Now to get them in place, a job for more than one man and his wife so the regulars popped over to help. Not to worry though the straight flight went in first and after constructing the framework for the quarter landing (not supplied) the flight was lifted into position. The newel posts and strings were already mortised and tenoned so it was just a case of gluing them together with the handrail, lifting into place and fixing the top newel post to the joists. It was almost like building with Lego, each part slotting together easily, the only bit of real joinery was cutting the handrails to length and cutting the tenons on the ends.
 |
| The regulars on site to help install the stairs |
 |
| Initial installation complete. Newel post bolted to trimmers between joists |
The other set of stairs was less simple, with a quarter landing half way up (not supplied) the framework for the landing had to levitate somewhere in the air. I decided the most solid means of achieving this was to build a tower of blocks in the corner on which to stand the frame and also create a useful cavity under the stairs accessed from the little room.
 |
| My wife thought this was funny |
 |
| Initial installation of the lower stairs complete. The newel posts at the top were bolted to a steel beam which supports the landing. A very solid fix. |
That was the stairs in place so it was no longer necessary to climb ladders between floors, suddenly a flash of inspiration !! Why not move into the loft? (temporarily you understand) just one problem, no insulation, so that was the next job.
I mentioned in an earlier post that we had designed the roof as a sealed roof and part of that design was that there should be an air space between the insulation and the roof membrane, so it was now necessary to provide the insulation and maintain that space.
The 100mm polyisocyanurate(I hate that word) needed to fit between all the rafters in the loft and should be cut to a snug fit and pressed into place without going in too far and compromising the air space. To prevent this, battens were fixed to every face of all the rafters 100mm in from the underside.
Fitting the insulation by cutting with a standard timber saw must be the most messiest and uncomfortable job I have done to date. The cutting generates clouds of choking particles which stick too your clothes with static, and spread everywhere. A second layer of 30mm insulation had to be fitted over the first to meet building regulations and this was fixed with screws and washers but thankfully in the last minute before fitting this layer which covered the rafters we remembered to mark the floor with their position or the plasterers would have cursed us. A few days later we had an insulated loft.
 |
| Insulation ready for installation, lot of it isn't there |
 |
| In Progress |
 |
| First layer finished |
Just a lick of paint and building the only stud wall with a cheap door in it and we moved in!!
 |
| Bed from the caravan |
 |
| Must have a tele |
 |
| Xtratherm, Xtratherm, Xtratherm dreams are made of this. |
Home from Home! It was good to get out of the caravan, a couple of winters did the trick but we still had to cook in there.
 |
| Insulating the kitchen and garden room ceiling |
 | ||
| More insulation, phew!! its getting warm in here |
Well that's it for now but next time on 'therealselfbuildblog' I will tell you how we started the plumbing and electrics and prepared for plastering.
If you have any questions about my blog or self build in general please email me. You can find my email address in my profile (top right of page). You can also become a follower of my blog by pressing the follower button or click on 'Comments' below to leave a message.
Thanks for viewing.


